Lesson: Paper Plate Flowers
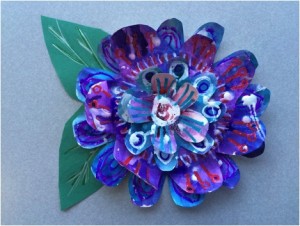
This 3D flower project is perfect for children wanting to try their hand at sculpture!
Goals:
- Apply 3D concepts to sculpture while developing fine motor and tactile skills.
- Inspire creative thinking through sculpture and painting.
Materials:
- 4 paper plates, uncoated
- Pencil, colored pencils
- Scissors
- Fast-dry tacky glue
- Oil pastels
- Watercolor paint OR watercolor magic
- Paintbrushes
- Water cups
- Solid construction paper
Directions:
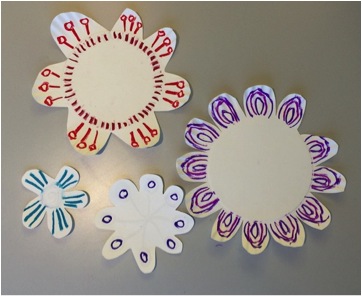 Cut four sizes of flowers from the paper plates. For younger children, have flowers pre-cut. One will just be the outer edges of the plate cut into petals, the next one will be 1-1.5 inches smaller, repeat.
- Draw patterns on the plates with oil pastels.
- Roll up the edges of each petal; a pencil works great!
- Put a large dot of glue in the center of the biggest plate, glue the second largest on top, repeat for all sizes.
- Allow the glue to dry for a few minutes. With the construction paper, cut leaves. Draw leaf patterns with colored pencils.
- Paint the flowers with watercolor or watercolor magic.
- Once dry, glue the leaves on to the back of the largest plate.
Tweak It!
- Use smaller plates and create smaller flowers to hang on a garland.
- Use watercolor magic in small spray bottles, or the rubbing alcohol technique, to get different designs on the flowers.
- Add buttons in the center.
Photos: Samples by Betsey
Lesson inspired by Pink Stripey Socks
© 2015 Arts For Life