C R E A T E: Animal Prints on Watercolor
When Arts For Life teachers pull out the printmaking supplies, it’s like a beacon: kids just gravitate to the art table. Something about the rolling tools, the squish of ink, the smooth-soft texture of drawing in Styrofoam; it’s just not like anything they’ve ever done before. (See this vintage footage of Arts For Life artist Johnathan for proof of the pure joy of printmaking!)
This lesson combines everything we love about easy printmaking plus everything we love about watercolor painting. Who could ask for more? If you don’t have all the tools, never fear! I few home-hacks can make this an easy lesson for at-home creating. Styrofoam meat trays (properly sanitized, of course) or take-out box lids make perfect printing plates. and an old plastic or wood rolling pin and an ink pad can replace the brayer and blockprinting ink.
Skill Level: ages 5+
Time Frame: 30-45 min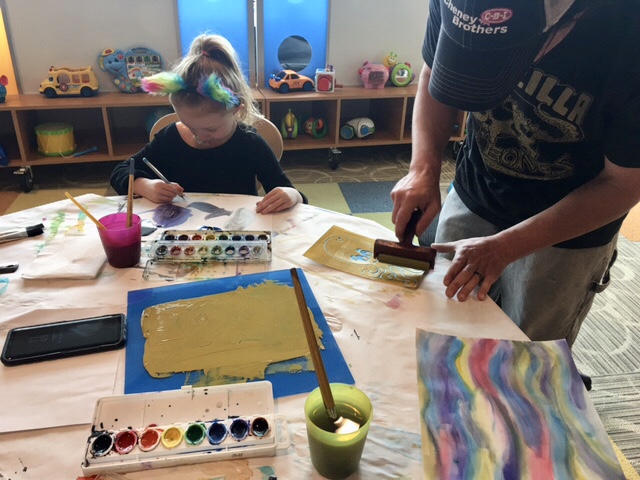
Goals
- To become familiar with the tools and techniques used in printmaking.
- To use watercolor techniques to create an interesting background paper on which to print.
Materials
- White Cardstock
- Watercolor Paints
- Brushes
- Cups for Water
- Salt, alcohol, crayon, plastic wrap, etc (Optional–for creating effects with the watercolor)
- Pencil and Scrap Paper (Optional)
- Scratch Foam or Styrofoam(6X9 or larger)
- Ballpoint Pen
- Black Blockprinting Ink or Stamp Pad
- Plexiglass
- Brayer or Rolling Pin
- Barren
Steps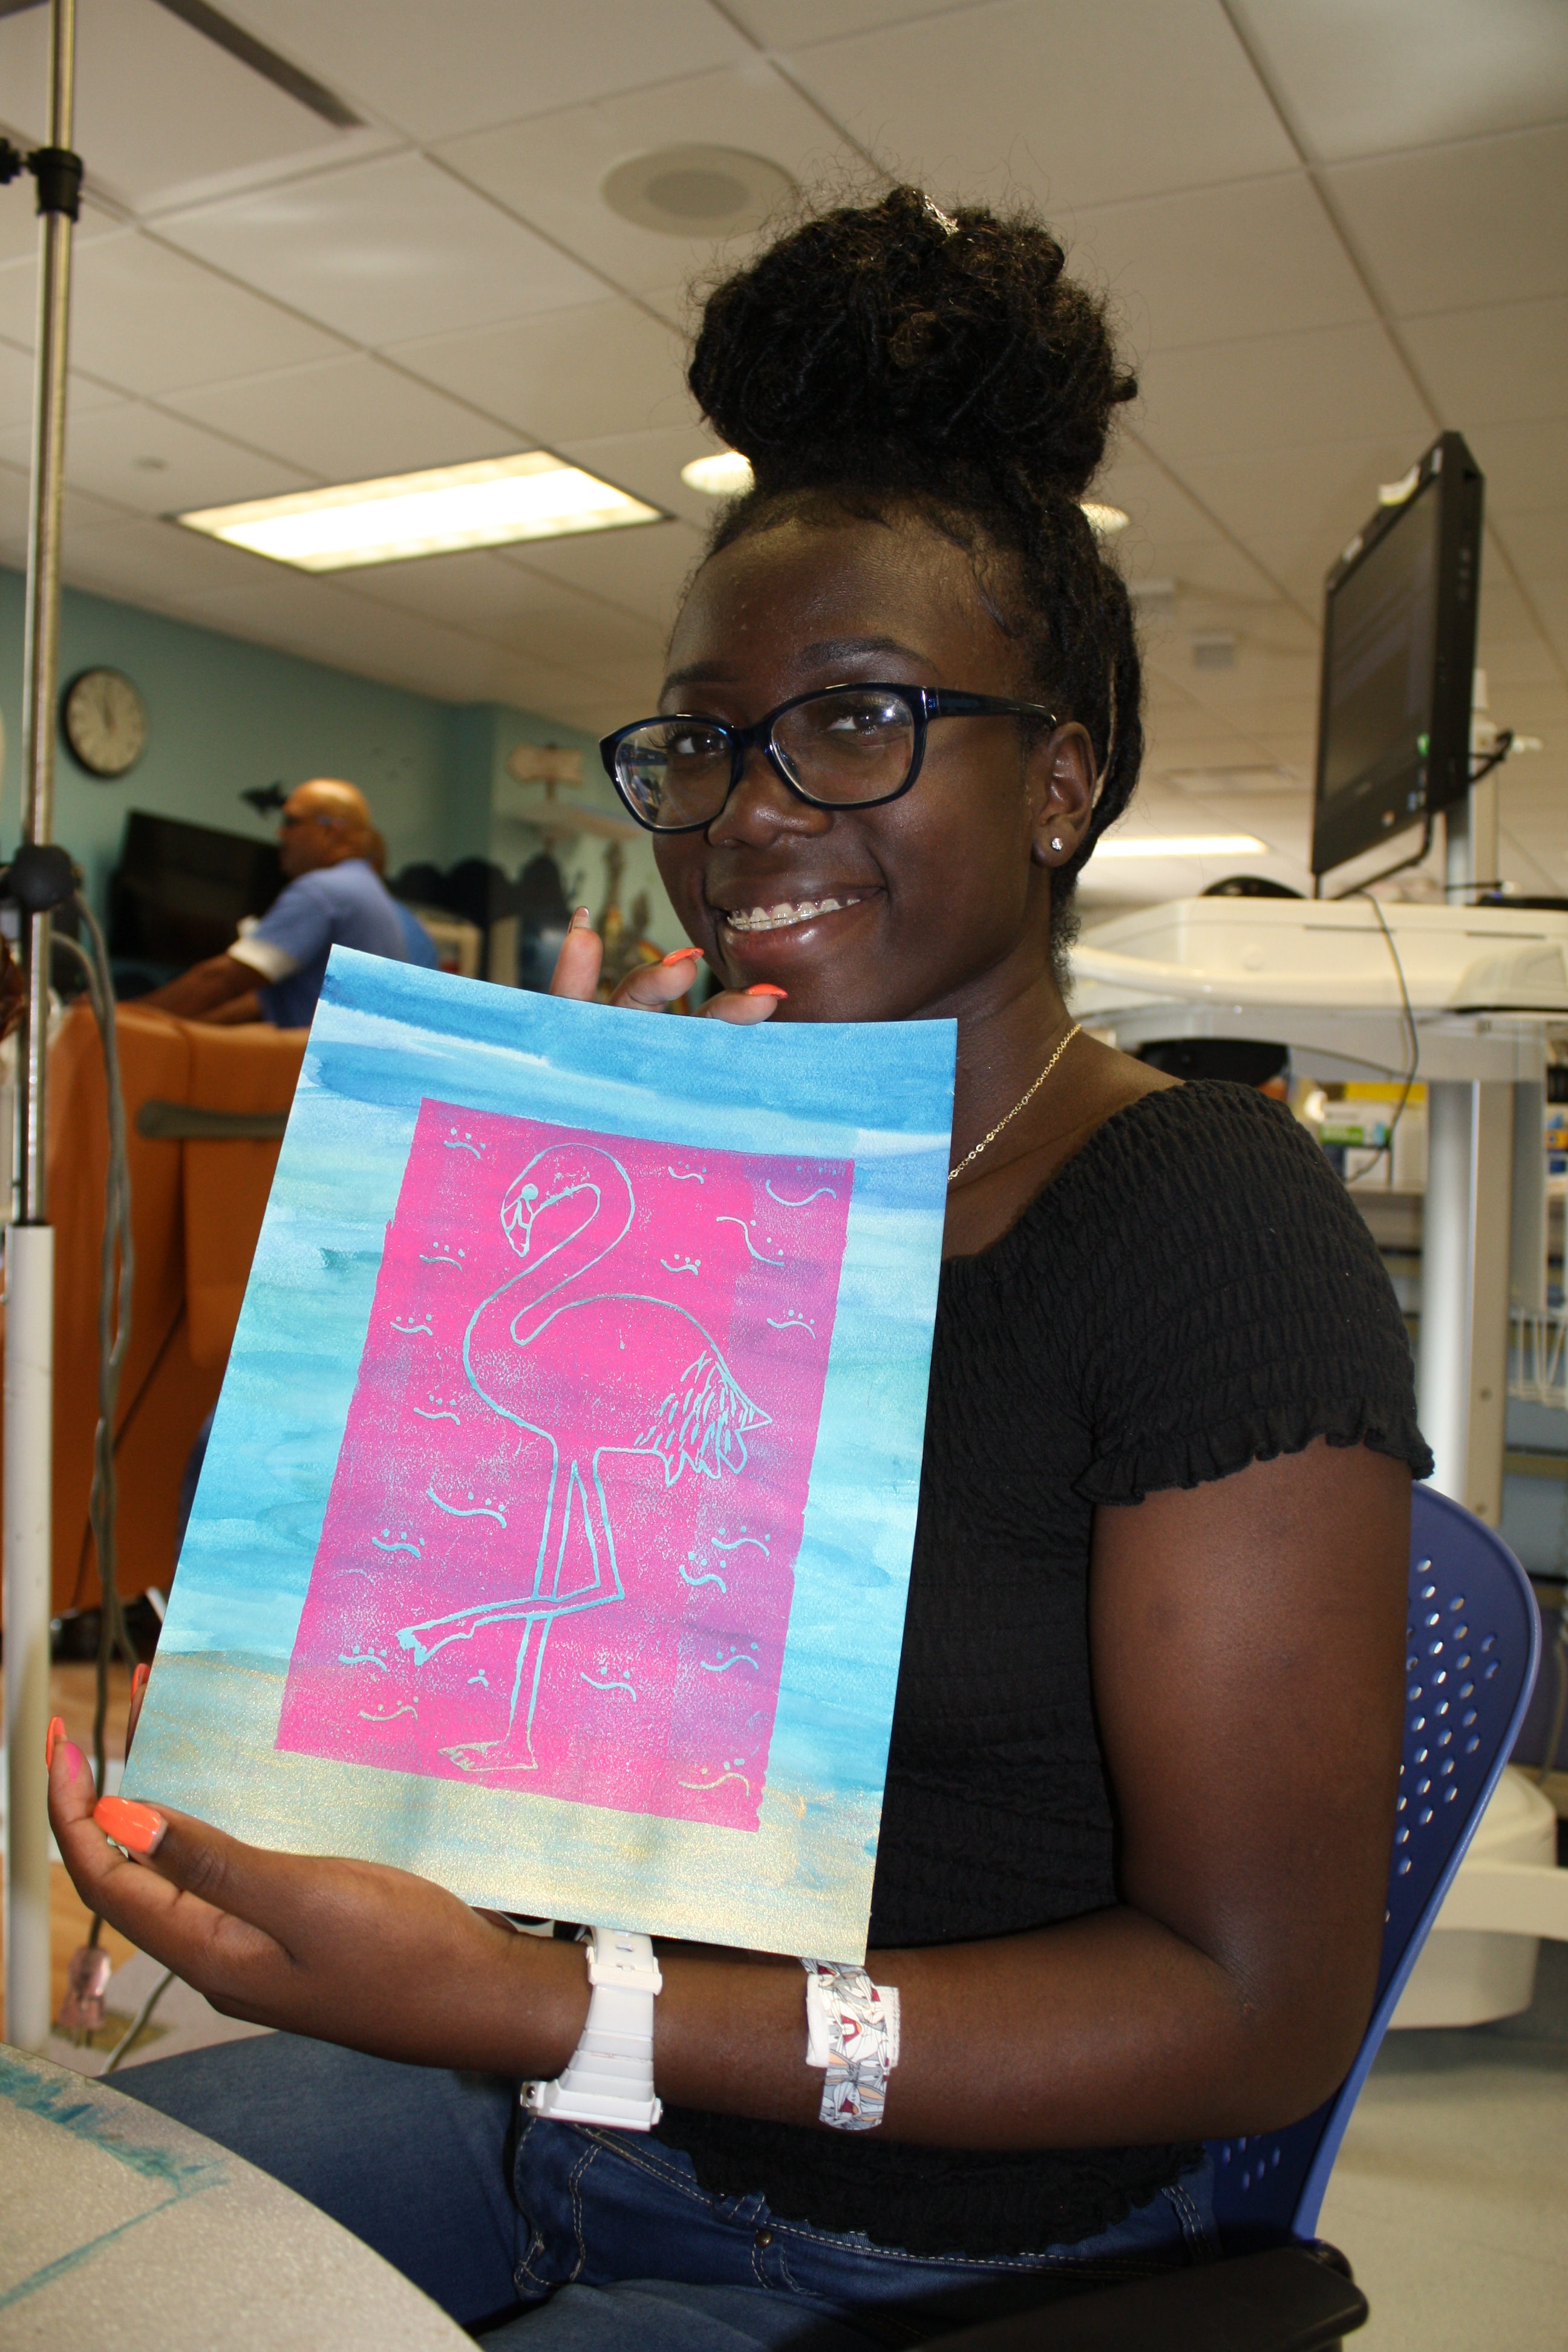
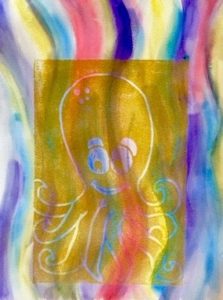
- Decide on an animal you’d like to draw. With that animal in mind, use watercolor paints to paint your paper using the colors you might find in that animal’s habitat. (You don’t have to paint that habitat; the idea is to keep the background more abstract, in order to make your animal pop.) For example, if your animal is a camel, you might want to use browns, yellows, and oranges in the background. If it’s a monkey, you might want to use greens and browns. Use salt, alcohol, etc, to add interest to your background, if you want.
- Allow your paper to dry completely—you can speed this process using a hairdryer.
- Using ballpoint pen, draw your animal directly onto the scratch foam. Draw BIG; make sure your drawing covers most of the foam. (If you want, you can practice first with a pencil on a piece of scrap paper).
- Add detail to your drawing; patterns can add visual interest. If you have room on the foam behind your animal, choose a simple pattern for that area as well.
- Squeeze some black ink onto a flat surface (such as a piece of plexiglass) and roll out with a brayer until you hear the “kissing” sound.
- Roll the ink onto your foam, making sure to create an even layer of ink over the whole piece.
- Center the foam on your painted paper and lay it down.
- Turn over your paper, with foam attached, and rub the back with a barren. Turn back over and peel off the foam.
Tweak It!
- Use the same process to print a self-portrait, or a portrait, or anything of your choosing!