C R E A T E: Willow’s Creative Cats Lesson
 Read the Book, Follow the Lesson!

In the bright, whimsical world of Willow, the title character of this wonderful children’s book, trees are pink, skies are yellow, and snowmen are not always men. But Willow’s strict art teacher doesn’t agree. Over the course of the book, we watch grumpy Ms. Hawthorne, inspired by the free-willed Willow, transform into a completely different kind of art teacher: one who celebrates self-expression and out-of-the-box thinking. (In other words, she looks a whole lot more like an Arts For Life teacher ;)This lesson too is inspired by Willow’s savvy sense of color and style. Rich oil pastels paired with watercolors create a bright resist, and using big paper makes each cat larger than life (literally!) If you don’t have oil pastels, don’t worry: crayons work just fine. And don’t forget to share your creative cats with us on Facebook and Instagram with the hashtag #sparkwithartsforlifenc
Age Level: age 4+
Time Frame: 45 min
Goals

Grumpy Ms. Hawthorn undergoes a dramatic transformation (all images from Willow)
- Promote self-expression through reading and painting.
- Improve drawing skills through repeated patterns.
- Encourage creative thinking while exploring watercolor techniques.
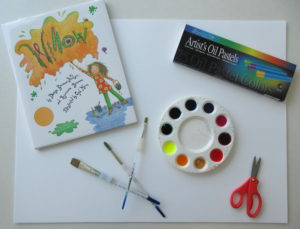
Materials
- Willow by Denise Brennan-Nelson and Rosemarie Brennan
- Large watercolor paper – at least 11×17 inches, the bigger the better! 16×20 is best
- Oil Pastels
- Paint – watercolors or watercolor magic
- Pattern design sheets for inspiration
- Scissors
Directions
- Read Willow. Discuss the book. Do you agree that you can paint objects with colors that are “unnatural”? What would it look like if we had wild colors and fun patterns on everyday objects that people know only to be a certain color (like a brown tree trunk and green leaves)? Let’s make our own wild and creative cat – imagine if cats weren’t just black, white, tabby, or orange. What if they had bright colors and patterns!
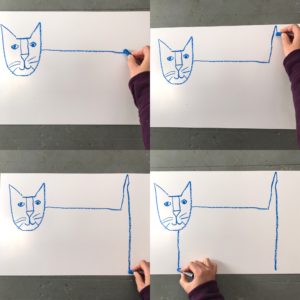
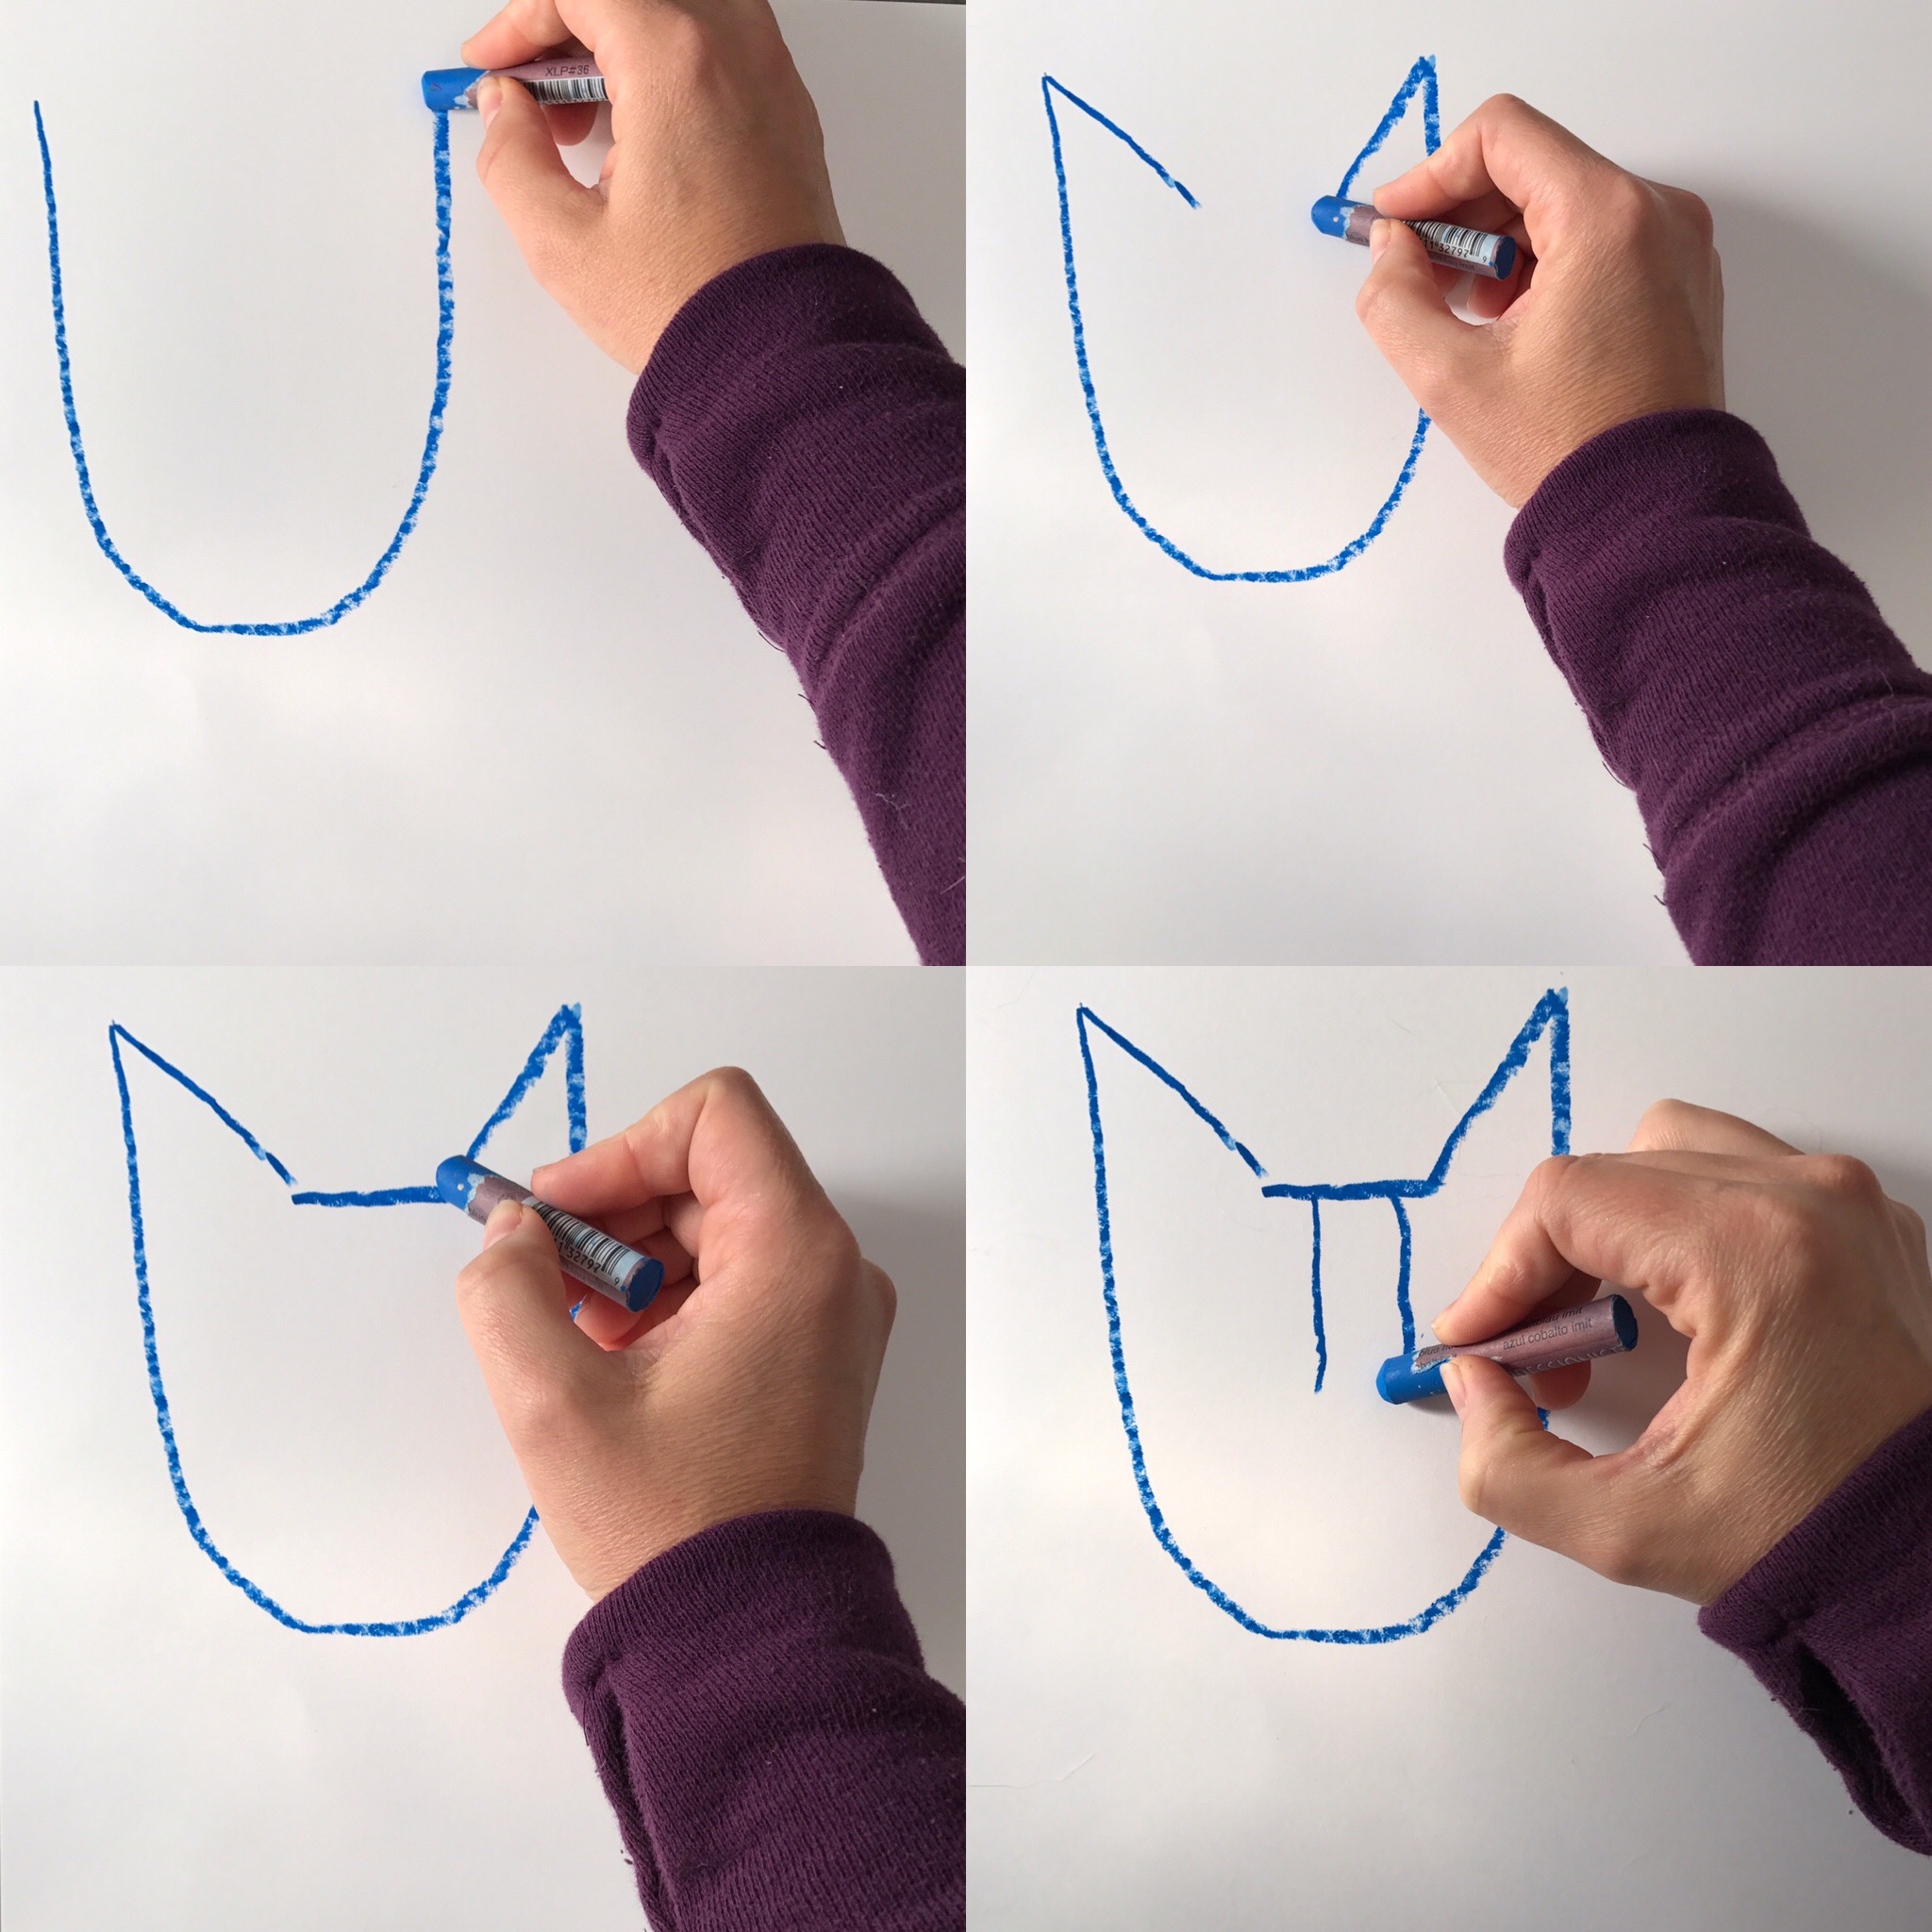
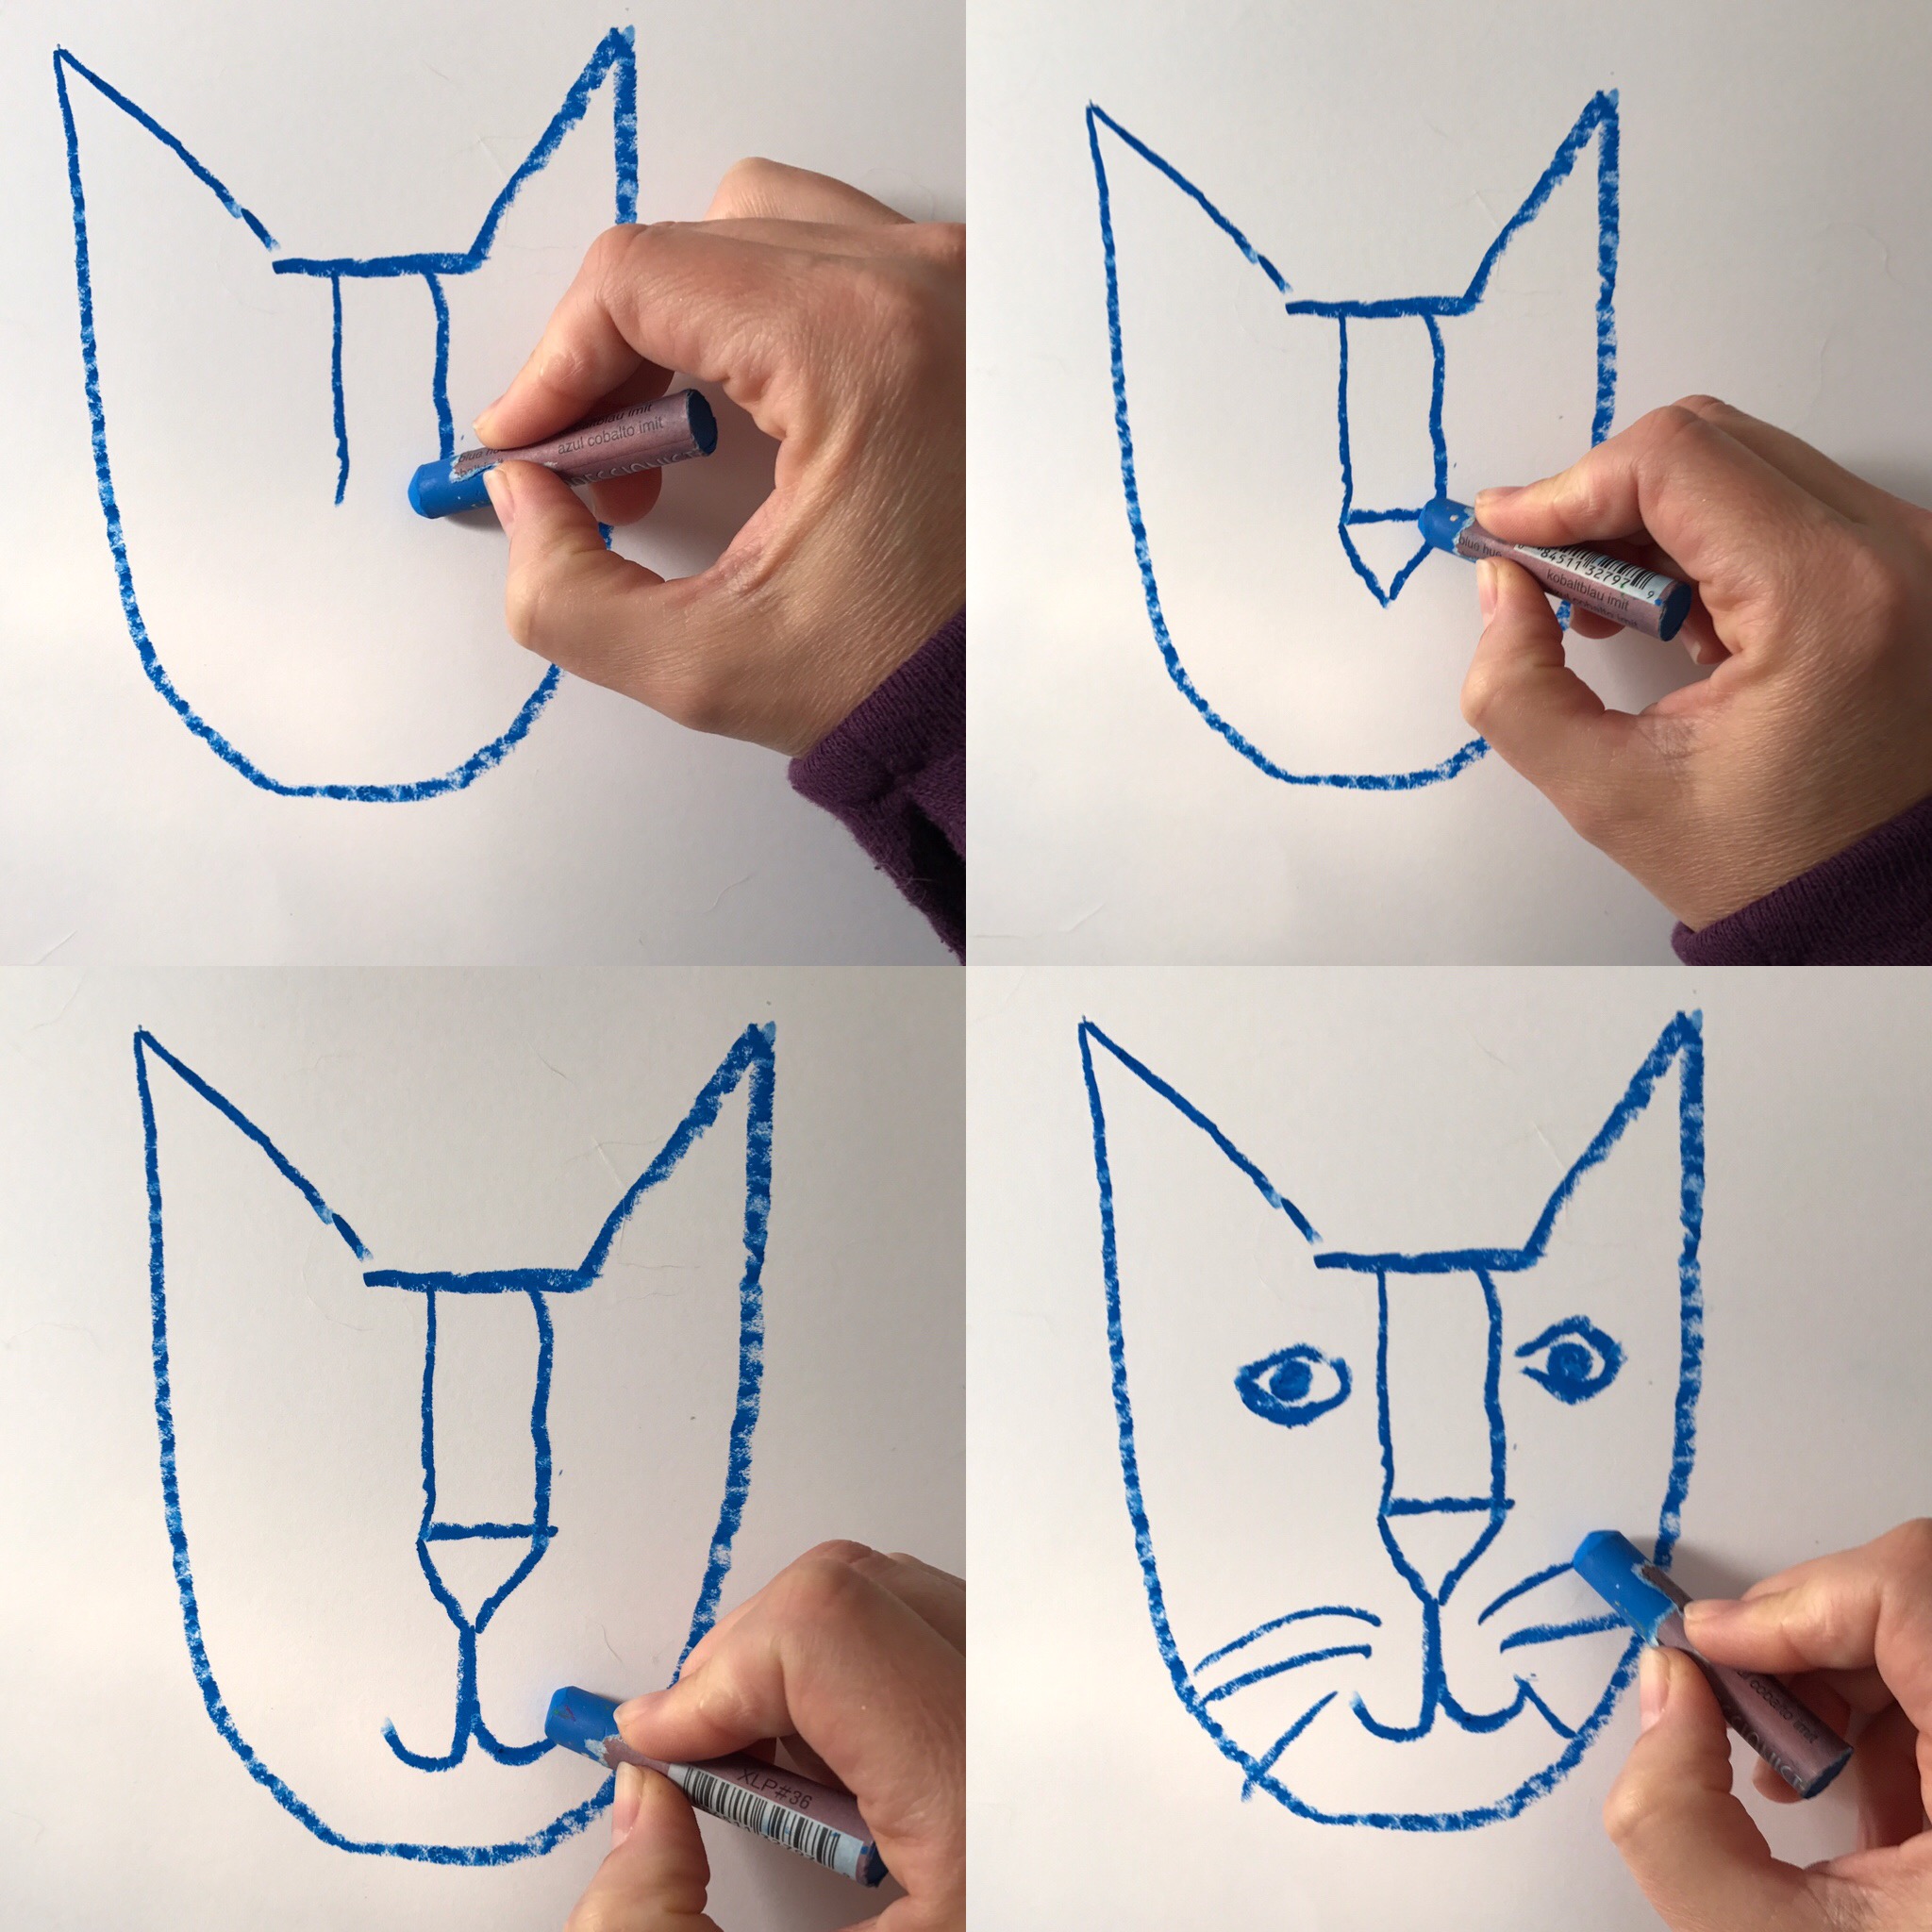
- For the head: Use an oil pastel to draw a large U in the upper left section of the paper. On either side of the U, draw a diagonal line down to make the ears. Draw a straight line across to connect the ears.

- For the face: draw two lines down from the top of the cat’s head. Connect them to make a rectangle. Draw a triangle below that. At the pointed base of the triangle, draw two curved lines pointing either directly for the mouth. Add eyes and whiskers.

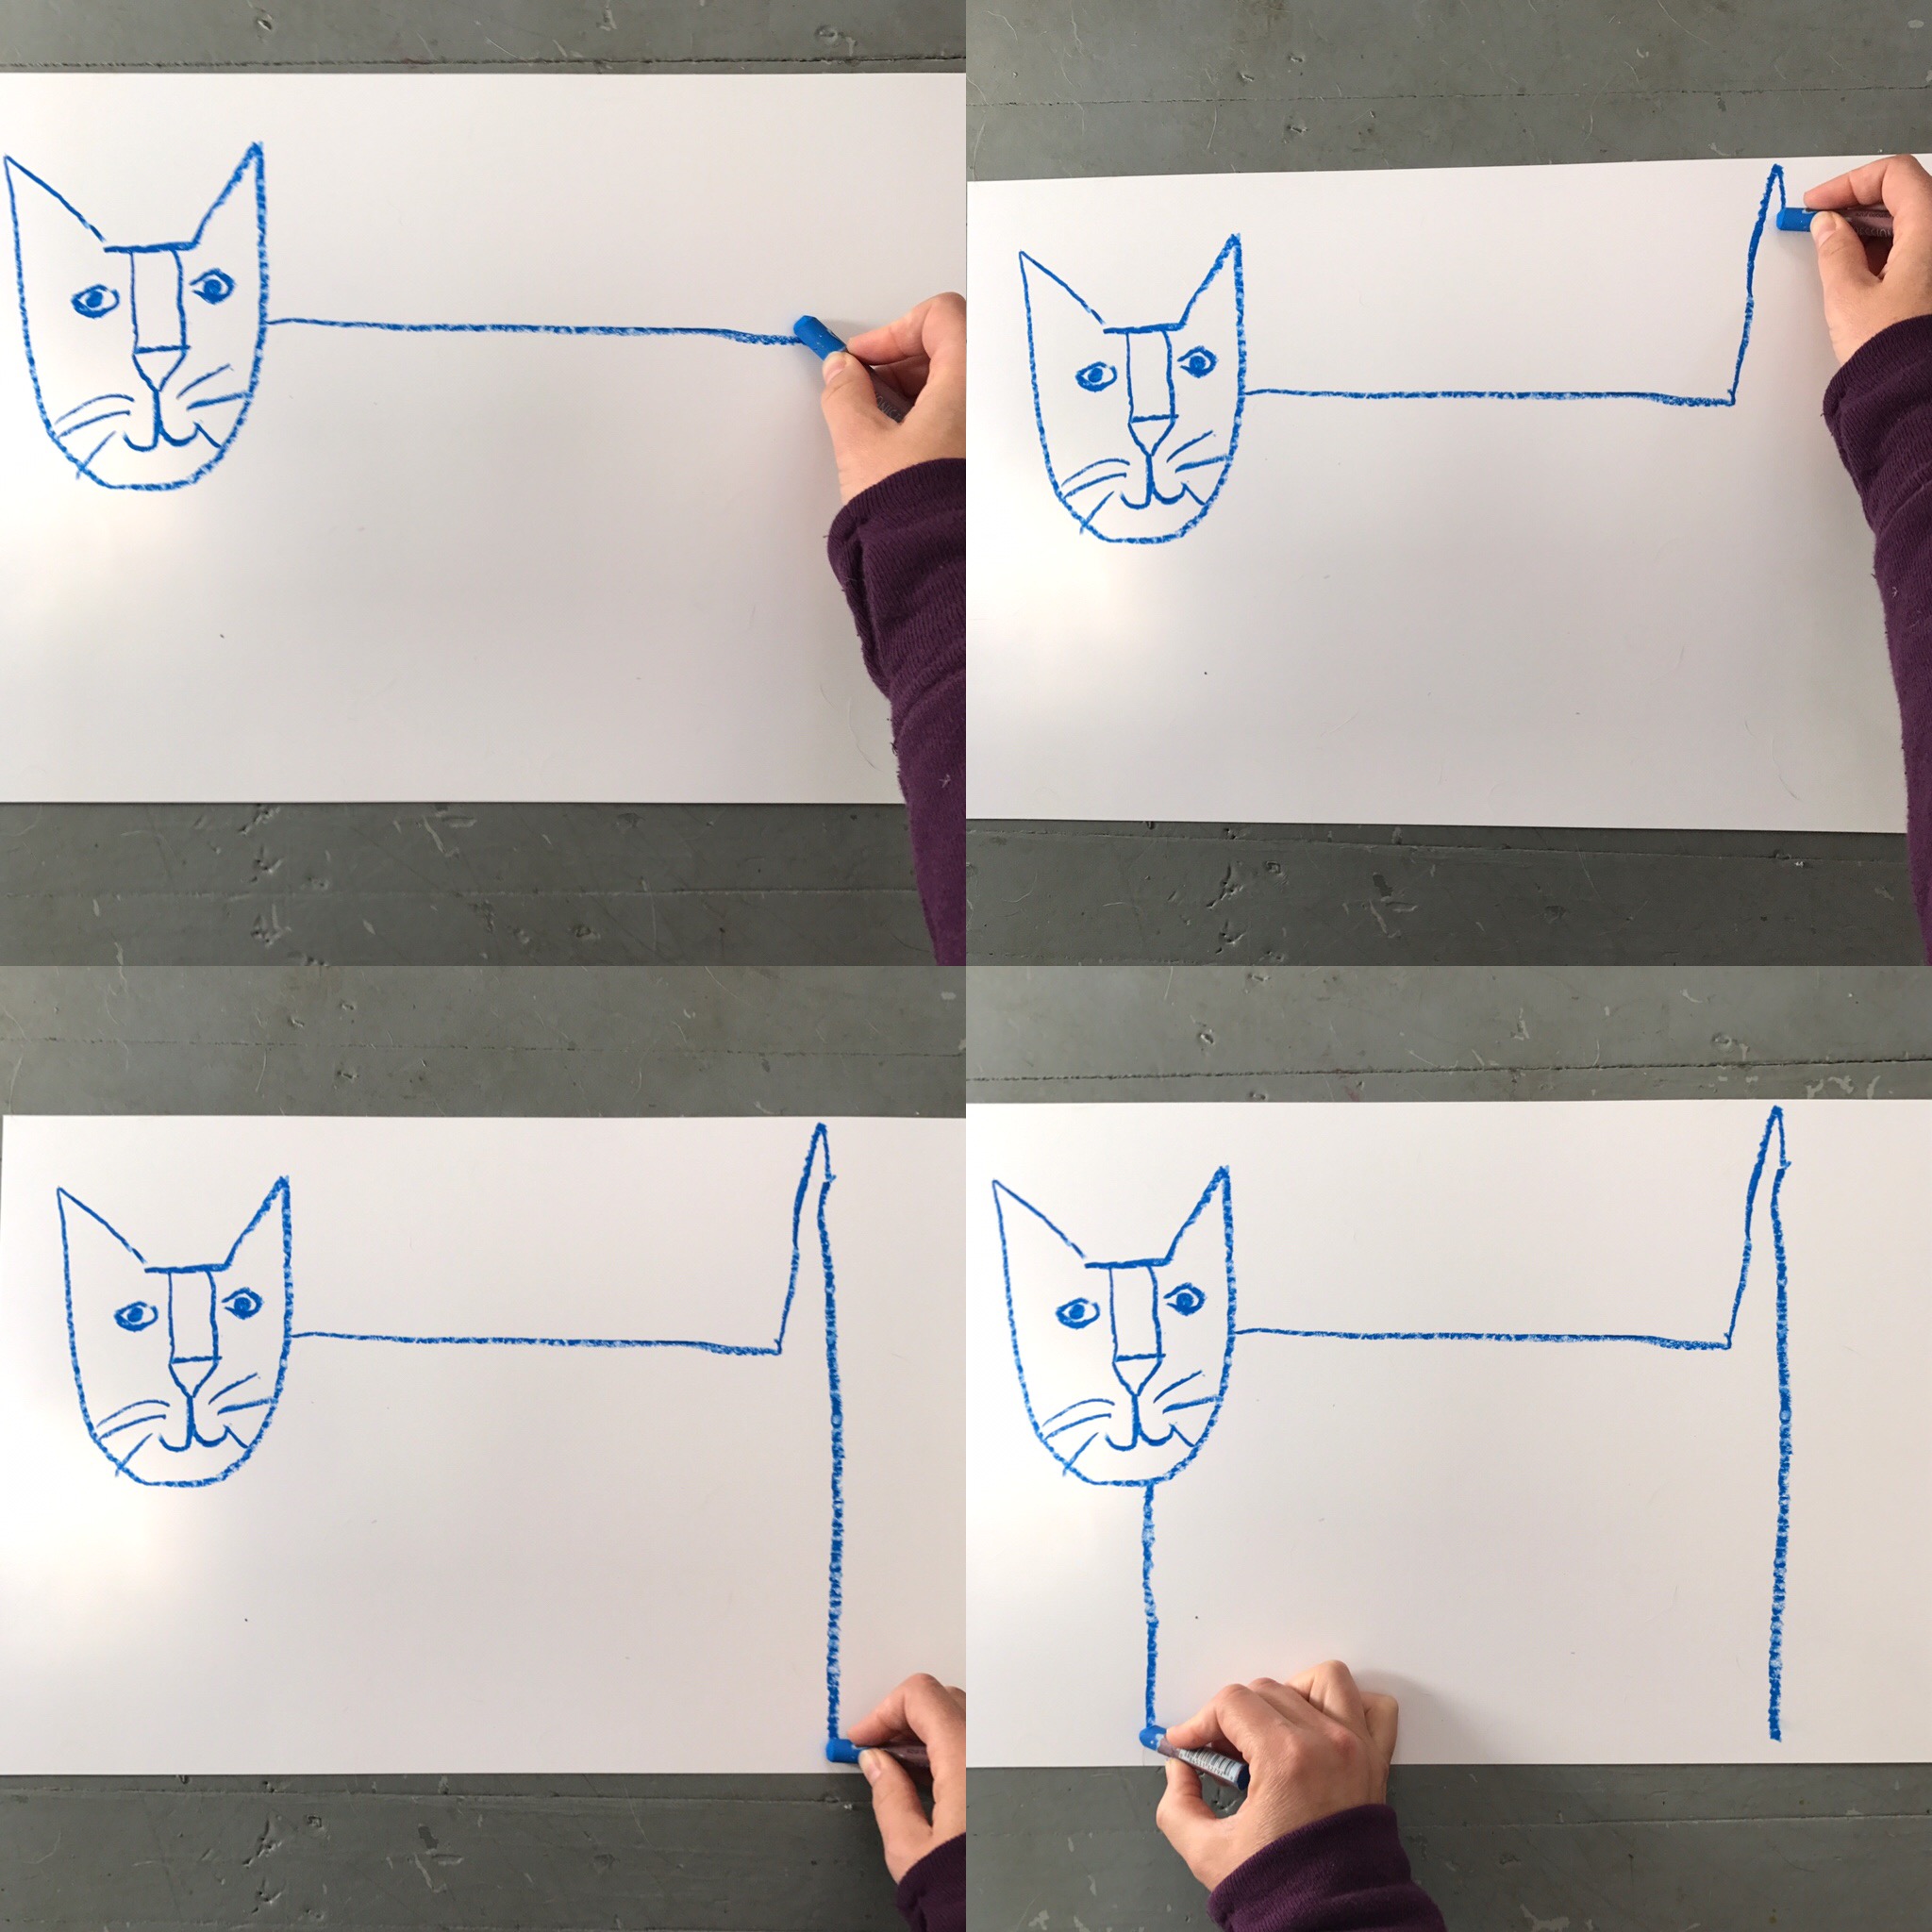
- For the body: from the middle of the U on the right side, draw a straight line across and then straight up to the top of the paper for the tail. Draw a straight line down from the top of the tail to the bottom of your paper to make the back leg. Draw a line from bottom of the U to the bottom of your paper for the front leg.
 Make the front and back legs into rectangles, then make two more legs in between. Connect with a straight line for the belly.
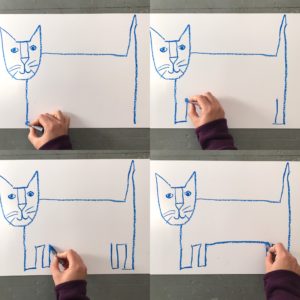
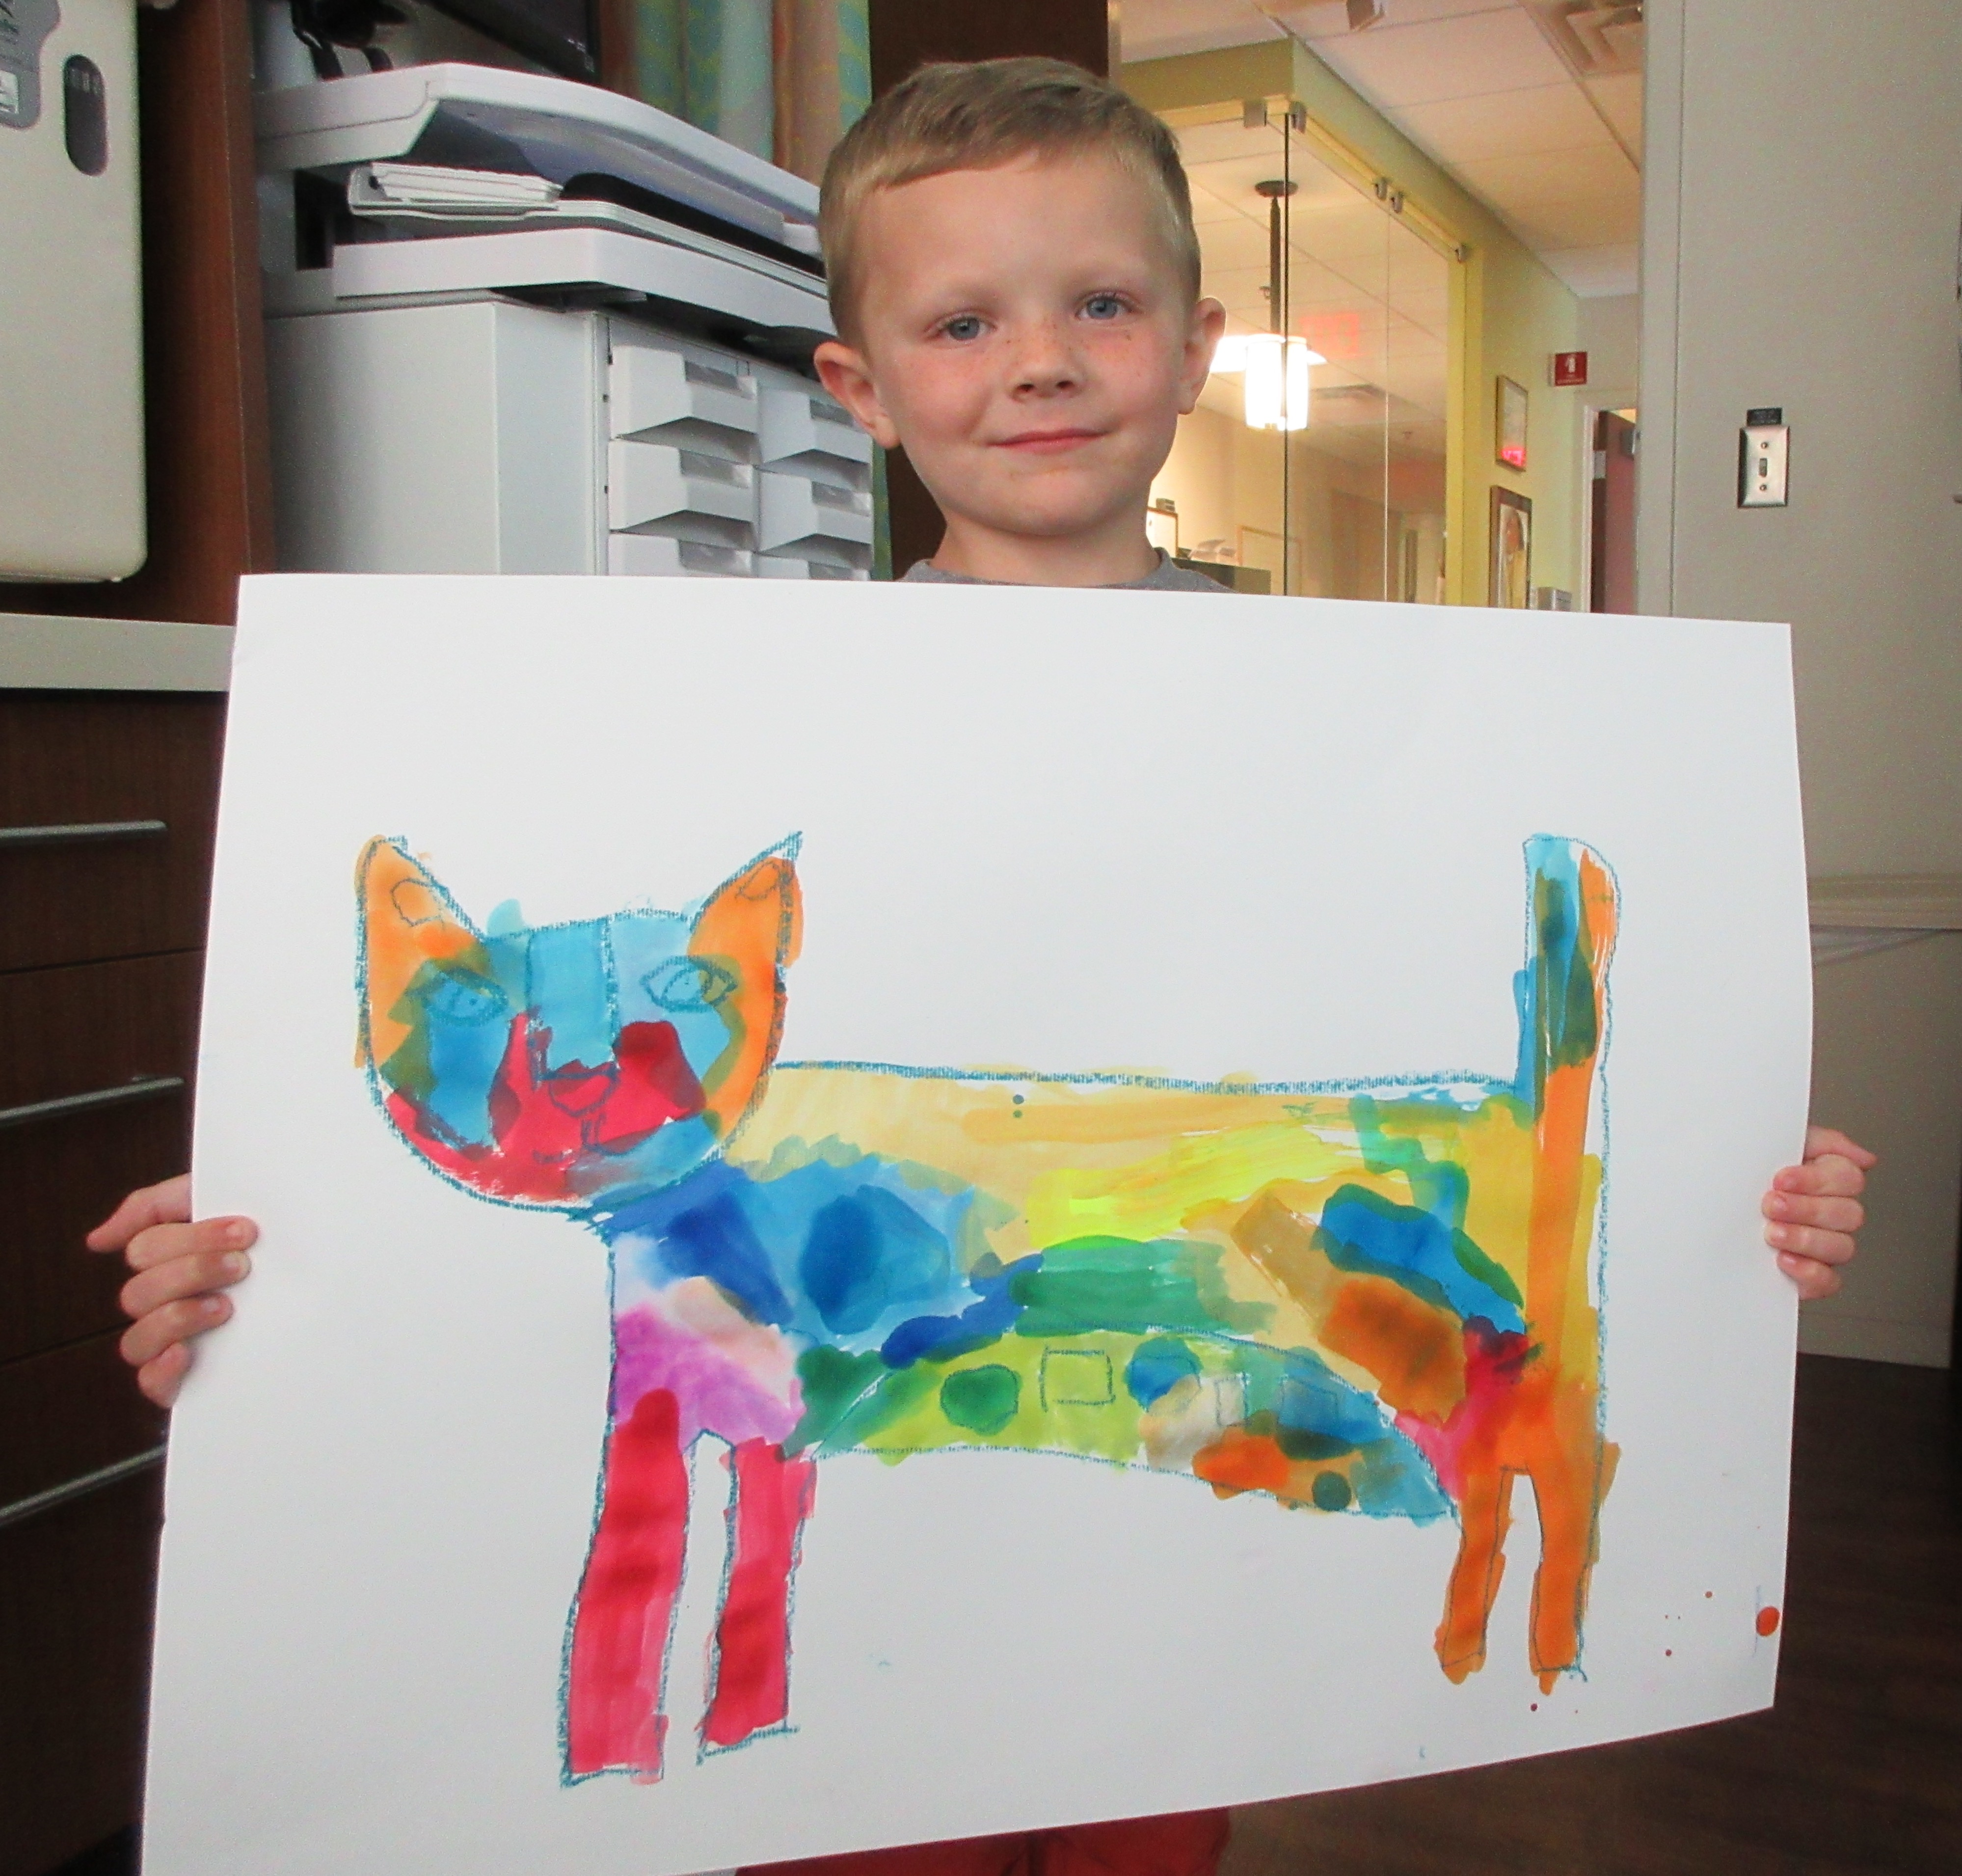
- Use colored oil pastels to add patterns to the cat.
- Use watercolors to paint over your patterns, creating a resist

Tweak It!
- Choose a different animal or object in nature!
- Work smaller and paint a picture of your favorite park or a zoo filled with brightly colored trees and animals.
- Make small versions of the cat and other animals, cut out, add a tab so they stand up and create a 3D world of animals you can play with.
Keeland

Carlie
Save